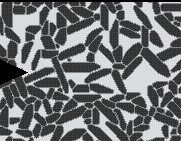
We start with the following image which represents anisotropic grains in a matrix:

This image is contained in the file called "micro.ppm". The program is started up by typing at the unix prompt the following command:
ppm2oof -f micro.ppm
Then the main window comes up, along with an "image window" and a "material window", it should look something like the following
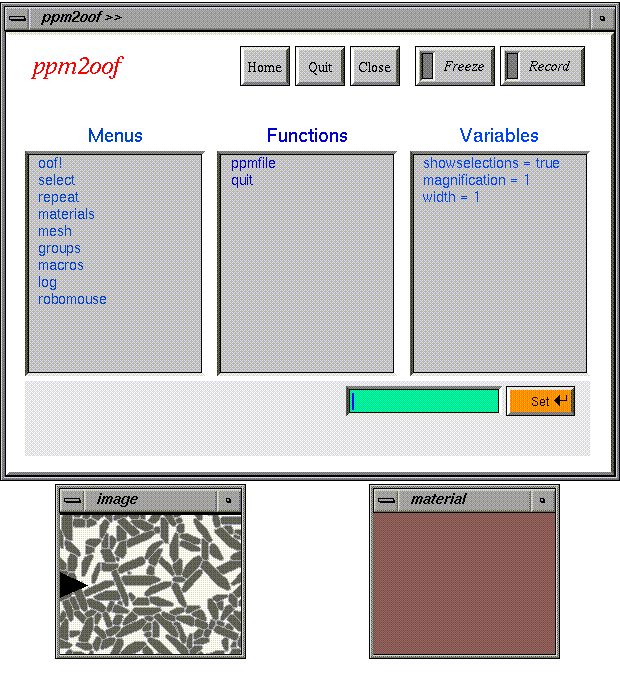
The object is to select different regions of the image and then assign material properties to them.
Notice that there are three different regions to the ppm2oof window: menus, functions, and variables. This window is called "the home menu" and every window has the same look to it (i.e., it has submenus, functions, and variables).
There are also various buttons. For instance, hitting the "home" button will always take you back to the home menu you see above. The other buttons are pretty self-explanatory, but they are described in more detail below.
Clicking on text in the Menu subpanel, brings up a new menu. For instance, if you are interested in selecting regions of the image, you would click on the "select" submenu.
Clicking once on text in the Function subpanel, executes that function. For instance, clicking once on "quit" executes quit. Clicking twice on Function text brings up a Function window, which will usually have fill out tables which specify parameters which affect the behavior of the chosen function. For example, in the select submenu, there is a submenu called called "method" which has a function called "rgb_burn." That Function window looks like the following:
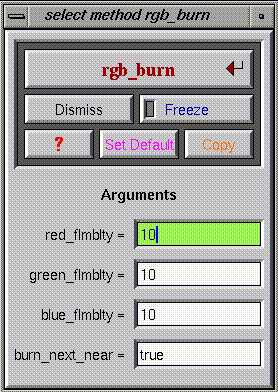
This particular function tries to identify "like" pixels around a pixel that you pick on the image. The various parameters are explained later, but notice that at the top of this function window, the words "select method rgb_burn" are printed-this tells you the menu path to this particular function. Here is what happens if one left-mouse clicks on one of the grains:
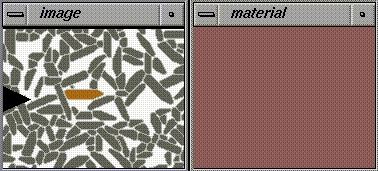
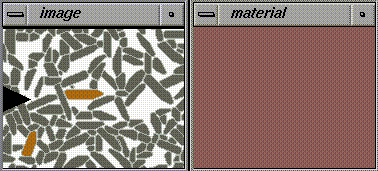
Notice, that one grain turns an ugly orange color-this identifies that region as "selected." Nothing has happened yet in the material window-that's because no material has been specified yet.
I can add to that selection by holding down the shift key and click on another grain. (left-click = "make a new selection"; shift-left-click = "add to current selection") For example:
Now, we can specify material properties for the selected regions. Find the materials submenu, and double-click on a material type in the Function subpanel. You will see various kinds of materials, one of the simplest is the isotropic material
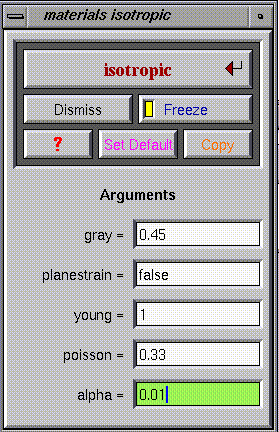
Executing this function has the following effect on the image and material windows:
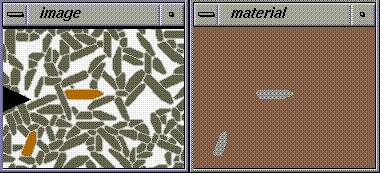
Notice that gray regions are appearing in the materials window, this is how one keeps track of which parts of the images have and haven't been assigned.
As soon as you have assigned materials to all parts of the image, or as many parts as you like and have defined a default material through the menu-path "materials default *function*", you can write out a file that "oof" can read and do simulations on.
You write an oof grid file (called a goof) by accessing the "oof!" submenu from the home menu.
That's it for this introduction. You should be able to create goof files yourself now, but if you get stuck, refer to the rest of the manual below.
One note before leaving. In the current meshing scheme, you get roughly two finite elements per pixel. Relatively small images can soak up lots of time when you do an oof calculation. We suggest you practice on pretty small images at first and get some immediate feedback and gratification. Graduate to bigger images when you are satisfied that you can run oof and take a lunch break while it finds a solution.